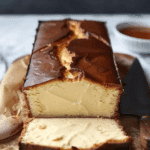
Why You’ll Love Burnt Basque Cheesecake in a Loaf Pan Recipe
This Burnt Basque Cheesecake is a game-changer for cheesecake lovers. The distinctive “burnt” top adds a rich depth of flavor, contrasting beautifully with the smooth, creamy filling. Using a loaf pan makes it more accessible and easier to serve, perfect for smaller gatherings or those who love a little twist on traditional cheesecake. The caramelization from the burnt top creates a rich, slightly smoky flavor that balances the sweetness of the filling. This cheesecake is also incredibly easy to prepare, requiring only a handful of ingredients and minimal hands-on time, making it a great option for any occasion.
Ingredients
(Tip: You’ll find the full list of ingredients and measurements in the recipe card below.)
-
2 pounds cream cheese, room temperature
-
1 ¼ cups granulated sugar
-
1 teaspoon vanilla extract
-
6 large eggs, room temperature
-
1 ½ cups heavy cream
-
¼ cup all-purpose flour
-
Pinch of salt
Directions
-
Preheat the oven to 400°F (200°C). Line a loaf pan with parchment paper, ensuring the paper extends above the rim of the pan for easy removal of the cheesecake later.
-
In a large mixing bowl, beat the cream cheese and sugar together using a hand mixer or stand mixer until smooth and creamy. Add the vanilla extract and continue mixing until fully combined.
-
Add the eggs, one at a time, beating well after each addition. Once all the eggs are incorporated, add the heavy cream and mix until smooth.
-
Sift in the flour and pinch of salt, then mix until everything is well combined and there are no lumps.
-
Pour the batter into the prepared loaf pan and smooth the top.
-
Bake for 50–60 minutes, or until the top is deeply golden brown and the edges are set, but the center is still slightly jiggly. This is the signature “burnt” look.
-
Once done, remove the cheesecake from the oven and let it cool to room temperature in the pan. Once cooled, transfer it to the refrigerator and chill for at least 4 hours, or overnight for the best texture.
-
When ready to serve, carefully remove the cheesecake from the pan using the parchment paper, slice, and enjoy!
Servings and Timing
-
Servings: 8–10 servings
-
Total time: 1 hour 15 minutes (not including chilling time)
-
Active time: 20 minutes
-
Chill time: 4 hours minimum (overnight recommended)
Variations
-
Chocolate Burnt Basque Cheesecake: For a richer twist, add ¼ cup of melted chocolate to the batter before mixing in the flour.
-
Berry Topping: Top the cooled cheesecake with fresh berries, such as raspberries or strawberries, for a fruity contrast.
-
Gluten-Free Version: Swap the all-purpose flour with a gluten-free flour blend to make this cheesecake gluten-free.
-
Mini Loaf Pans: You can divide the batter into smaller loaf pans for individual servings, reducing bake time.
Storage/Reheating
-
Storage: Store any leftover cheesecake in an airtight container in the refrigerator for up to 5 days.
-
Reheating: While this cheesecake is best served chilled, you can gently warm individual slices in the microwave for 15–20 seconds if you prefer it slightly warm.
FAQs
1. Can I use a different type of pan for this recipe?
Yes, you can use a round or square pan, but the baking time may vary. Just make sure to line the pan with parchment paper.
2. How do I know when the cheesecake is done baking?
The cheesecake should be deeply golden brown on top, with the edges set and the center slightly jiggly. It will continue to set as it cools.
3. Can I freeze Burnt Basque Cheesecake?
Yes, you can freeze it! Wrap the cheesecake tightly in plastic wrap and foil, then store in the freezer for up to 3 months. Thaw in the fridge before serving.
4. Why does the top of the cheesecake get so dark?
The signature burnt top comes from baking the cheesecake at a high temperature. This gives it a caramelized, almost smoky flavor that contrasts perfectly with the creamy filling.
5. Can I add flavorings to the cheesecake?
Absolutely! You can experiment by adding flavors like lemon zest, cinnamon, or chocolate chips to the batter for a unique twist.
6. Can I make this cheesecake in advance?
Yes, Burnt Basque Cheesecake can be made up to a day in advance. The flavor improves after chilling for several hours or overnight.
7. What makes Burnt Basque Cheesecake different from regular cheesecake?
Unlike traditional cheesecake, Burnt Basque Cheesecake is intentionally baked at a high temperature until the top is deeply browned and caramelized. The result is a creamier, more rustic dessert.
8. Why does my cheesecake crack?
Small cracks are normal, especially with Burnt Basque Cheesecake. The high baking temperature and lack of a water bath can cause the top to crack, but it adds to the rustic charm of the cake.
9. Can I substitute the heavy cream with something lighter?
While heavy cream gives the cheesecake its rich texture, you can substitute with whole milk for a lighter version. The texture will be less rich but still creamy.
10. Is Burnt Basque Cheesecake gluten-free?
This recipe contains flour, but you can easily make it gluten-free by using a gluten-free flour blend.
Conclusion
Burnt Basque Cheesecake in a loaf pan is an easy-to-make and deliciously indulgent dessert that’s perfect for any occasion. Its unique burnt top, creamy filling, and simple ingredients make it a standout dessert. Whether you’re making it for a special event or just a sweet treat for yourself, this cheesecake will undoubtedly impress. Enjoy!
Burnt Basque Cheesecake in a Loaf Pan
5 Stars 4 Stars 3 Stars 2 Stars 1 Star
No reviews
Indulge in the creamy goodness of a Burnt Basque Cheesecake in a Loaf Pan. This decadent, caramelized cheesecake features a rich and velvety texture with a perfectly charred top, making it a showstopper for any occasion. Learn how to make this simple yet irresistible dessert using a loaf pan for an easy, no-fuss version of the classic Basque cheesecake.
- Author: Emily
- Prep Time: 15 minutes
- Cook Time: 45 minutes
- Total Time: 1 hour
- Yield: 6-8 servings
- Category: Dessert
- Method: Baking
- Cuisine: Spanish
- Diet: Vegetarian
Ingredients
- 1 lb (450g) cream cheese, softened
- 1 cup (200g) granulated sugar
- 1/4 cup (60ml) heavy cream
- 1/2 cup (120ml) full-fat sour cream
- 1 teaspoon vanilla extract
- 3 large eggs
- 1/4 cup (30g) all-purpose flour
- Pinch of salt
- Butter (for greasing)
Instructions
- Preheat Oven: Preheat your oven to 400°F (200°C). Line a loaf pan (about 8×4 inches) with parchment paper, leaving some overhang for easy removal of the cheesecake later. Grease lightly with butter.
- Prepare the Batter: In a large mixing bowl, beat the softened cream cheese with an electric mixer until smooth. Gradually add sugar and mix until fully combined and creamy.
- Add Wet Ingredients: Add the heavy cream, sour cream, and vanilla extract to the cream cheese mixture, and continue to beat until smooth.
- Incorporate Eggs: Add the eggs one at a time, beating well after each addition.
- Add Dry Ingredients: Sift the flour and salt into the mixture and mix until everything is combined.
- Bake: Pour the batter into the prepared loaf pan. Bake for about 40-45 minutes, or until the top is deeply golden brown and cracked, and the center is still slightly wobbly.
- Cool and Serve: Allow the cheesecake to cool in the pan. Once cooled, remove from the pan using the parchment paper. Chill for a few hours before serving to allow the texture to set. The cheesecake can also be served at room temperature.
Notes
- Baking Tip: The “burnt” look is key to this cheesecake’s signature flavor, so don’t be afraid of the darkened top. It adds depth and a caramelized taste.
- Storage: Store leftover cheesecake in the refrigerator for up to 3 days.
- Texture: The cheesecake should be creamy on the inside with a nice contrast between the burnt top and smooth filling.


