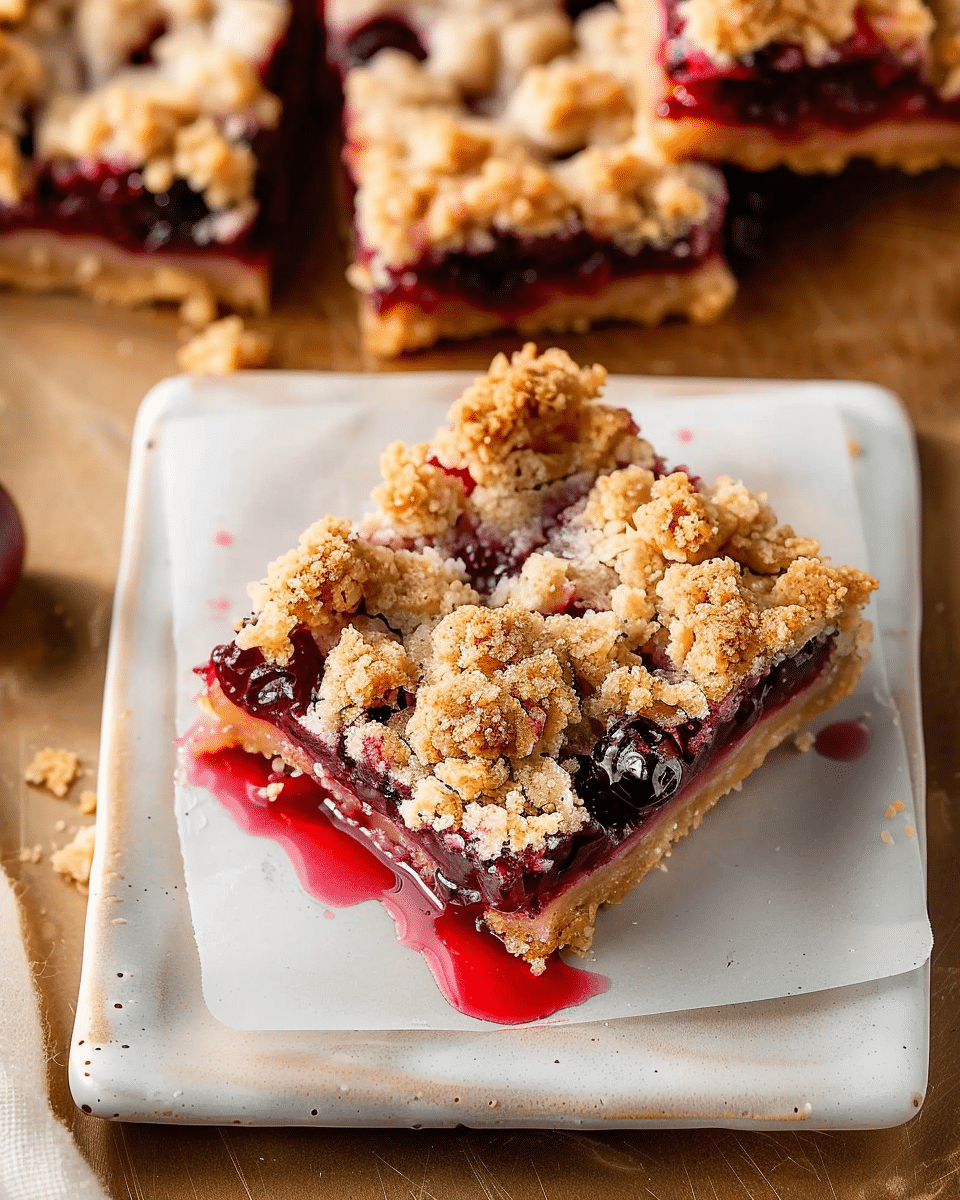
Why You’ll Love This Recipe
- Easy to Make – No complicated pie crust required! Just mix, layer, and bake.
- Perfect Texture – A buttery crust, juicy cherry filling, and crumbly topping create a delicious combination.
- Great for Any Occasion – Whether it’s a holiday dessert or a casual treat, these bars fit the bill.
- Customizable – Easily switch up the fruit filling for a different twist.
- Make-Ahead Friendly – These bars store well and taste even better the next day.
Ingredients
(Tip: You’ll find the full list of ingredients and measurements in the recipe card below.)
- All-purpose flour
- Granulated sugar
- Unsalted butter
- Baking powder
- Salt
- Eggs
- Vanilla extract
- Cherry pie filling
Directions
- Preheat & Prepare – Preheat your oven to 350°F (175°C) and line a baking pan with parchment paper or lightly grease it.
- Make the Crust & Crumb Topping – In a bowl, mix the flour, sugar, baking powder, and salt. Cut in the butter until the mixture resembles coarse crumbs. Add the eggs and vanilla, mixing until combined.
- Assemble the Layers – Press about two-thirds of the mixture into the bottom of the prepared pan to form the crust. Spread the cherry pie filling evenly over the crust.
- Add the Topping – Crumble the remaining dough mixture over the cherry layer, creating a crumbly topping.
- Bake – Place in the oven and bake for 35–40 minutes or until the top is golden brown.
- Cool & Serve – Let the bars cool completely before slicing into squares.
Servings and Timing
- Servings: Makes about 12–16 bars
- Prep Time: 15 minutes
- Cook Time: 35–40 minutes
- Total Time: 50–55 minutes
Variations
- Swap the Fruit – Try blueberry, apple, or raspberry pie filling for a different flavor.
- Add Nuts – Sprinkle chopped almonds or pecans over the crumb topping for a crunchy twist.
- Citrus Zest – A little lemon or orange zest in the crust enhances the flavor.
- Gluten-Free Option – Use a gluten-free all-purpose flour blend for a gluten-free version.
Storage/Reheating
- Room Temperature – Store in an airtight container for up to 2 days.
- Refrigerator – Keep in the fridge for up to 5 days.
- Freezer – Wrap bars tightly and freeze for up to 3 months. Thaw in the fridge before serving.
- Reheating – Warm in the microwave for a few seconds if you prefer them slightly warm.
FAQs
How do I prevent the crust from getting soggy?
Make sure to bake the bars until golden brown, and allow them to cool completely before slicing.
Can I use fresh cherries instead of pie filling?
Yes! Cook fresh cherries with sugar and cornstarch until thickened before using.
What size pan should I use?
An 8×8 or 9×9-inch baking pan works best, but a 9×13-inch pan can be used for thinner bars.
Can I make these bars ahead of time?
Yes! They taste even better the next day as the flavors meld together.
What’s the best way to cut these bars cleanly?
Use a sharp knife and wipe it clean between cuts for neat slices.
Can I add a drizzle on top?
Absolutely! A simple powdered sugar glaze or white chocolate drizzle adds a nice touch.
How do I make the bars more buttery?
Use high-quality butter and slightly increase the amount for a richer taste.
Can I make these bars dairy-free?
Yes! Substitute dairy-free butter or coconut oil for the butter.
Are these bars good for potlucks?
Definitely! They’re easy to transport and a crowd favorite.
Do I need to refrigerate these bars?
They can stay at room temperature for a day or two, but refrigeration helps them last longer.
Conclusion
Crumb-topped cherry pie bars are a delicious and easy dessert that captures the essence of cherry pie in a convenient bar form. With their buttery crust, sweet-tart cherry filling, and crumbly topping, they’re perfect for any occasion. Whether you’re baking for a special event or just craving a homemade treat, these bars are sure to impress. Give them a try and enjoy a slice of cherry pie bliss in every bite!
Crumb-Topped Cherry Pie Bars
These Crumb-Topped Cherry Pie Bars are the perfect dessert for cherry lovers! With a buttery crust, a sweet and tart cherry filling, and a golden crumb topping, these bars are easy to make and perfect for any occasion. Enjoy a slice of cherry pie in a convenient bar form!
- Prep Time: 15 minutes
- Cook Time: 40 minutes
- Total Time: 55 minutes
- Yield: 12-16 bars
- Category: Dessert
- Method: Baking
- Cuisine: American
- Diet: Vegetarian
Ingredients
For the Crust and Crumb Topping:
- 2 ½ cups all-purpose flour
- 1 cup granulated sugar
- 1 cup unsalted butter, melted
- ½ teaspoon salt
- ½ teaspoon baking powder
For the Cherry Filling:
- 4 cups fresh or frozen cherries, pitted
- ¾ cup granulated sugar
- 2 tablespoons cornstarch
- 1 tablespoon lemon juice
- 1 teaspoon vanilla extract
Instructions
-
- Preheat the Oven – Preheat your oven to 350°F (175°C) and line a 9×13-inch baking dish with parchment paper.
- Prepare the Crust & Topping – In a mixing bowl, combine flour, sugar, melted butter, salt, and baking powder. Stir until crumbly. Press ⅔ of the mixture into the prepared baking dish to form a crust. Set the remaining crumb mixture aside for topping.
- Make the Cherry Filling – In a saucepan over medium heat, combine cherries, sugar, cornstarch, and lemon juice. Cook until the cherries release juices and the mixture thickens (about 5 minutes). Remove from heat and stir in vanilla extract.
- Assemble the Bars – Spread the cherry filling evenly over the crust. Sprinkle the reserved crumb mixture over the top.
- Bake – Bake for 35-40 minutes, or until the top is golden brown.
- Cool & Serve – Let the bars cool completely before slicing into squares. Enjoy!
Notes
- You can use canned cherry pie filling instead of fresh or frozen cherries for convenience.
- Add a teaspoon of almond extract for extra flavor.
- Store in an airtight container for up to 3 days or refrigerate for up to a week.


